Christmas 2014 – Lawn Fawn Snow Day Shaker Card

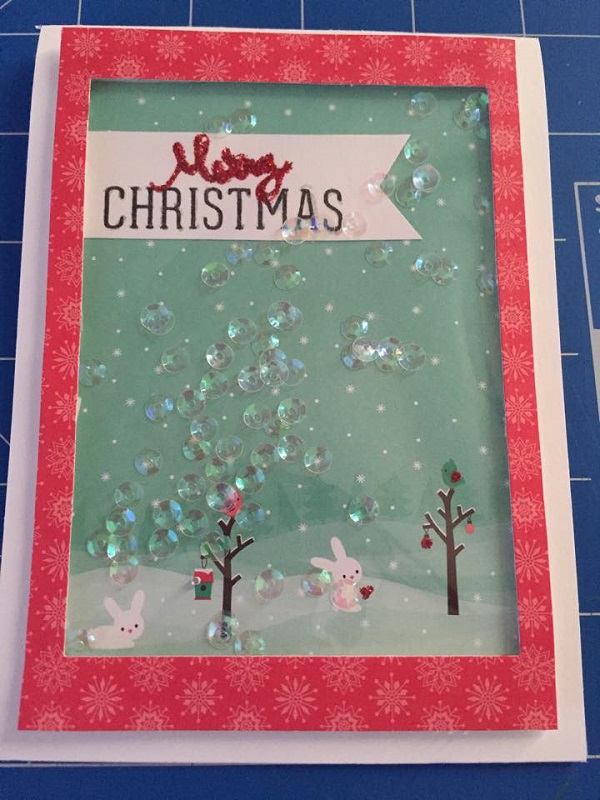
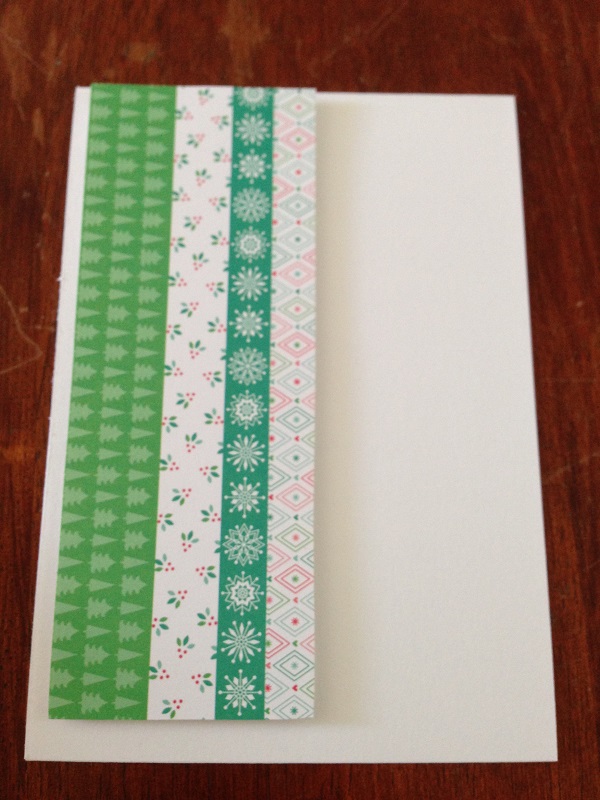
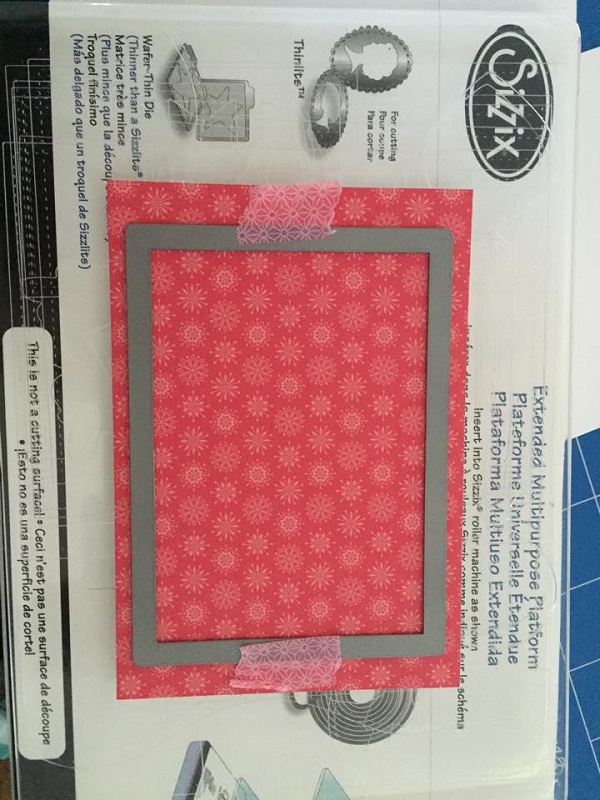
This card I made for a friend that lives in Japan. I wanted to do a shaker card for her. I measured sheet of red paper with a snowflake pattern to fit within the dimensions of the card and then I cut out a window from that using the Lawn Fawn Large Rectangles Stitched Stackables. This paper is from the Lawn Fawn Snow Day 6×6 paper pack.

Lawn-Fawn-Stackables-Die

From there I measured out background which I thought the pattern paper with the cute bunnies in the snow would be perfect. This is also from the same Lawn Fawn Snow Day paper pack.

Lawn-Fawn-Christmas-Papers

Lawn-Fawn-Snow-Day

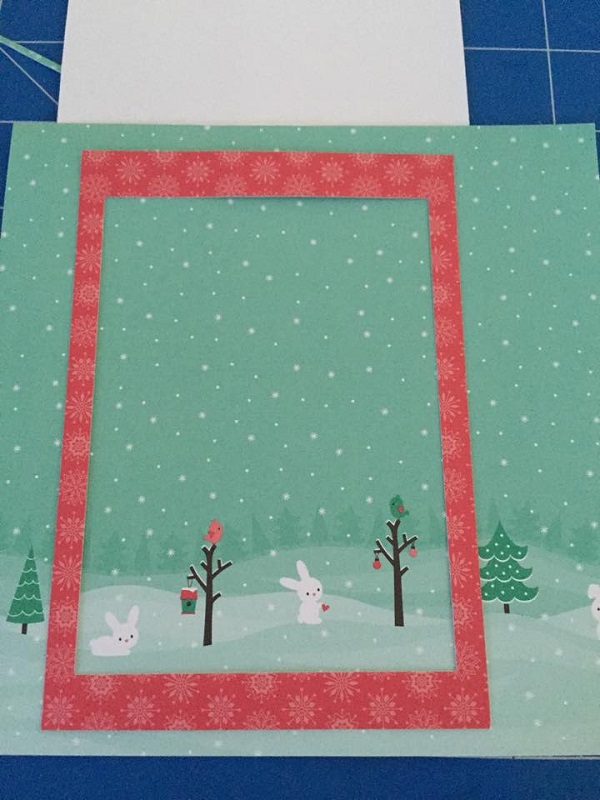
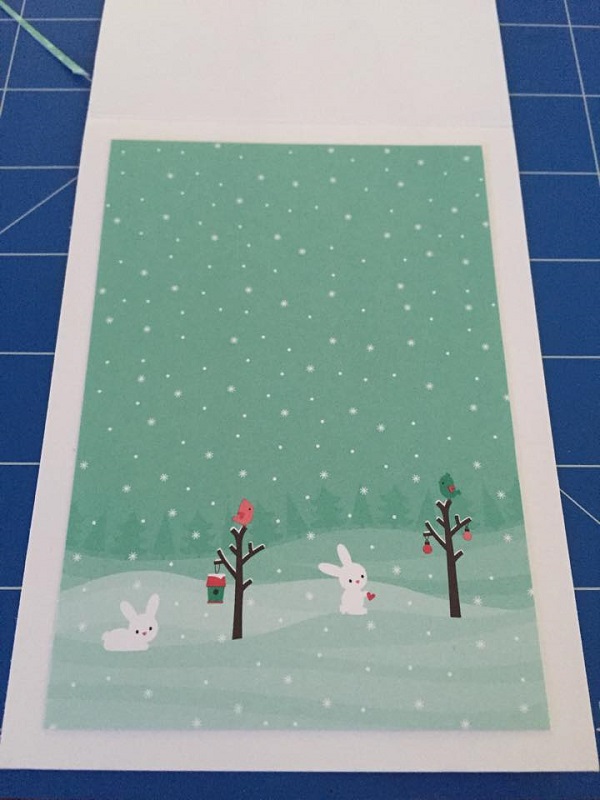
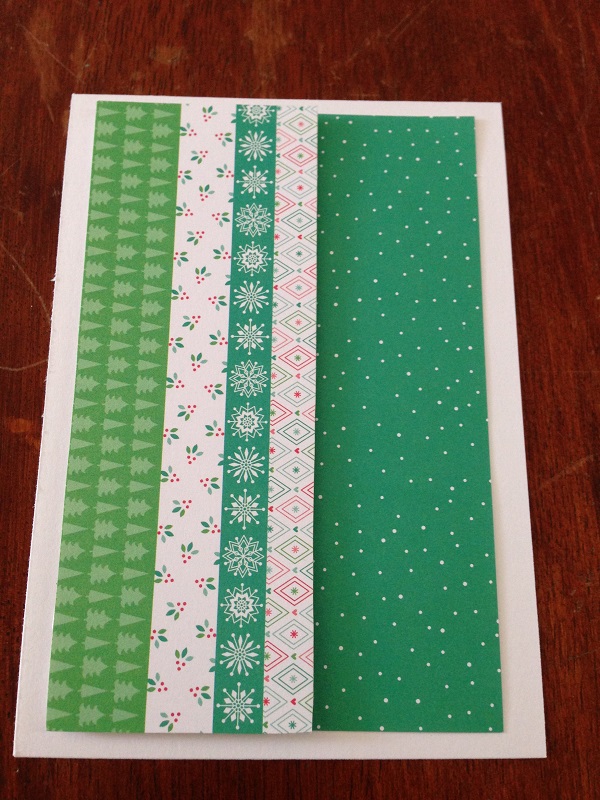
Once I had the background measured and cut out I adhered it to the card.

Lawn-Fawn-Christmas-Card

I double checked the pattern papers aligned nicely and there was nothing sticking out from behind the red pattern paper.

Lawn-Fawn-Snow-Day-Idea

Then I cut a strip of white card stock and cut a triangle form one end to make a ribbon banner.

Lawn-Fawn-Merry-Christmas

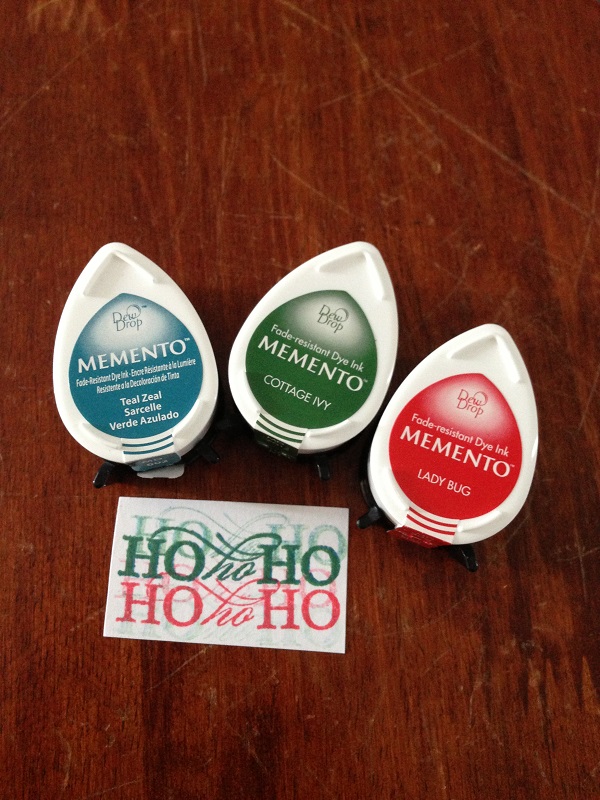
I stamped ‘Merry’ in red and ‘Christmas’ in black from the Simon Says Stamp Holiday Greetings stamp pack. I adhered the ribbon to the pattern paper.

Stickles-Christmas-Red-Idea

I wanted to jazz it up a bit so I used Christmas Red Stickles to go over the ‘Merry’ sentiment and I added a few accents on the red portions of the pattern paper, such as the heart the bunny is holding and Christmas bauble hanging in the tree.

Lawn-Fawn-Snow-Day-Card

It took ages to dry! But once the stickles was all set, I put poured some sequins into the centre.

How-to-make-a-shaker-card

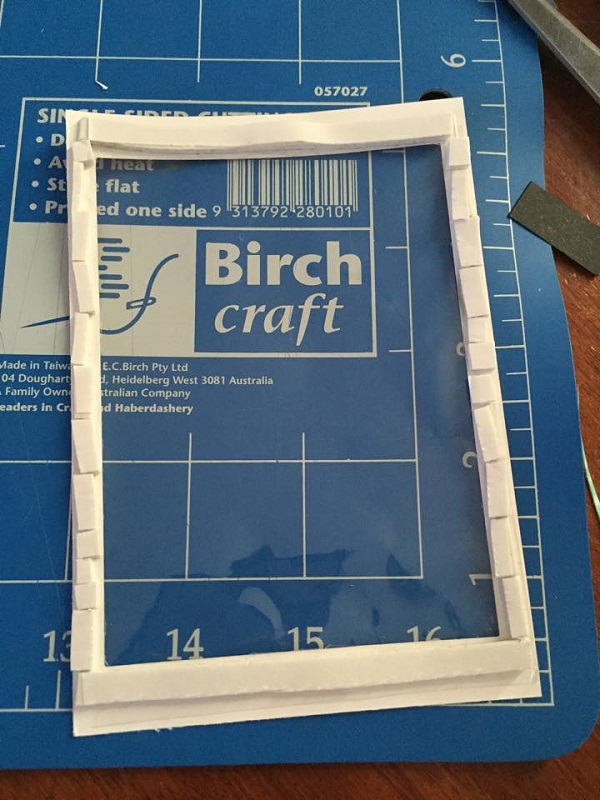
I cut some clear plastic wrap, from a scrap packet that had contained embellishments, to fit the ‘window’. And then I lined it with foam tape. It took a while to peel all the strips off, haha! But once I had, I adhered it on top of the background and the shaker card was all done! Shake, shake, shake!

Lawn-Fawn-Snow-Day-Shaker-Card-Idea

Christmas 2014 – Christmas Card Making – League of Legends Nasus Christmas Card

I wanted to make very personalised Christmas cards for three of my dear friends. This post covers the second of three.

The friend I had in mind for this card used to play a lot of League of Legends with me. I used to play as Nasus mostly but I haven’t played for quite some time. My friend still plays often and now he uses the character Nasus primarily. So that is how I came about the idea of doing a Nasus Christmas card.

I used a similar tact as with the Ma Chao Christmas card and I sketched a chibi style Nasus. I then photocopied the sketch and practiced a few different colouring-in ideas. Then I coloured in the final version. Because Nasus has so much gold, I used a Zig Wink of Stella glitter pen to give all the gold some glittery shine.

This is the link to the reference art: http://ddragon.leagueoflegends.com/cdn/img/champion/splash/Nasus_0.jpg

Because Nasus is a demigod that has dominion over death and time, he’s obviously a little bit of a darker character so I chose darker colours for the colour scheme of the card.

Nick_1

I used an A4 black cardstock sheet and folded it in half using my Martha Stewart Score Board. I had scrap pieces from the Echo Park Christmas Cheer Collection and used two strips of Christmas Phrases pattern paper bordered by the chalkboard black paper from the same Echo Park Christmas Cheer Collection. I also used some plain navy paper from the Simon Says Stamp December 2014 Card Kit.

This card really flowed and came together just as I would like. I adhered the strips onto the black cardstock then cut off the excess with scissors.

Nick_2

I didn’t like Nasus just ‘floating’ on the card and I had drawn him as though he were taking a step forward so I sliced a strip of the chalkboard black plain paper and used foam squares to create a step for Nasus to step onto.

The hardest part was to tie a sentiment between Christmas and all the morbid quotes of Nasus. I finally found a quote to work with “your spirit is hollow” one of his attacking quotes. It was simple to replace ‘hollow’ with ‘merry’ for the Christmas vibe.

I hand wrote the sentiment using a white gel pen on scrap black cardstock and placed that partially behind Nasus’ head. I used oodles of foam squares to get a 3D effect of Nasus taking that step up and also to really make him pop out of the card.

Nick_3

I was super excited with the finished look and all that was needed was a personalised sentiment for Christmas and New Years inside the card and it was ready to gift. I wasn’t giving any material presents this year (due to saving money) but as these three friends are so important I really wanted to give them something special and unique.

Christmas 2014 – Christmas Card Making – Lawn Fawn Snow Day Christmas Card Idea

This is a quick Christmas card I put together for my Japanese tutor. I used scraps left over from other Christmas cards from the Lawn Fawn Snow Day 6 x 6 Paper Pack.

Machiko_1

I layered the large brown rectangle at the bottom with the peacoat pattern paper rectangle on top bordering to the right-hand side and then on top of those I adhered the red coloured snowflake pattern paper at an angle.

From there I adhered the cute Christmas bunny pattern paper at an opposite angle. Then, I sliced the ‘for you’ tag, also a part of the Lawn Fawn Snow Day 6 x 6 paper pack. I punched a hole at the top using the Crop-a-dile Big Bite II and tied a bow using the Lawn Fawn Peppermint twine.

Machiko_2

To finish, I stamped ‘Merry’ and ‘Christmas’ using the Simon Says Stamp Happy Holidays stamp pack onto the red snowflake pattern paper and cut out triangles from the end to make a banner.

This card was quick and easy and I really liked the results. I would have liked to use white embossing powder to emboss the ‘Merry Christmas’ sentiment but I didn’t have a heat gun at this time so I had to work with what I had.

Christmas 2014 – Christmas Card Making – Dynasty Warriors Ma Chao

I wanted to make very personalised Christmas cards for three of my dear friends. This post covers one of three.

The friend I had in mind for this card used to play a lot of Dynasty Warriors with me and his favourite character was Ma Chao. In the game, Ma Chao would shout ‘for justice!’ So the idea came together that I would have the sentiment ‘for Christmas!’

The hard part was trying to draw Ma Chao. I had to work within my skills and I’ve done some training drawing Japanese stylized chibi characters in the past. So I gathered my old reference books and brushed up my skills and then went on the prowl online for a good Ma Chao reference. I found one I really liked that I thought would challenge me but be reasonable within my skills.

This is link to the reference art: http://www.zerochan.net/1428910

I sketched him out and when I was happy with the sketch (it took like entire night…), I made some photocopies. I wanted to colour it in with pencils but I didn’t want to ruin the original with a mistake. So I did about two or three test colouring-ins to find which colours I wanted to use on the original sketch.

With Ma Chao and his gallant steed sketched, coloured and cut out, I then got some A4 vanilla cardstock ready to put the card together.

Josh_1

I used my Martha Stewart Score Board to fold the card nicely in half. Ma Chao and his steed were quite large and so I needed a larger than normal size card to fit them on.

Being that he [Ma Chao] was drawn in a manga style I thought it’d be cool to have some action lines and I was flipping through my Christmas pattern papers and I found one I liked that I thought would be very suitable. It was in the Echo Park Christmas Cheer Collection and it is called Festive Stripes. Festive Stripes was so vibrant and busy though that Ma Chao became lost in the background so I needed something else behind him in order to keep the focus on Ma Chao.

I used a coordinating pattern paper in the same Echo Park Christmas Cheer Collection and it was just a plain red in the matching hue of the stripes. I cut that into a strip and placed that in the center of the stripes and placed Ma Chao on top.

I then needed to stamp out the sentiment. I used a Hero Arts lower case letter set (it’s all I had haha!) It was fun stamping the letters. I stamped them onto a scrap piece of vanilla cardstock and placed that at the bottom of the card.

Josh_2

The above picture isn’t actually the final product that is me just testing where everything is going to sit. It seems I omitted to take a final photograph or if I did I lost it. I used lots of foam squares to adhere Ma Chao and the sentiment down. I liked the idea of making the horse look like it was jumping over the sentiment strip. I used foam squares on top of foam squares around the horse and Ma Chao to really try and give the 3D effect of him jumping out of the card.

After that, it was a personalised Christmas message and New Years wish for my friend on the inside and it was all done!

Christmas 2014 – Christmas Card Making –Stripes & Snow Flakes

This Christmas card is probably my favourite of the season and was the most enjoyable to make. I was so proud of it. I made it for a friend that has become very dear and who I share many similar interests with, such as card-making and jigsaw puzzling.

In the Lawn Fawn Snow Days 6×6 Paper Pack there is a pattern paper that has pattern stripes made up from the individual pattern papers. When I first saw it, I didn’t think I would actually use that paper for anything because it’s so busy but I found I liked the four stripes seen pictured and so I cut them from the other stripes to use as a border piece on the card.

card_2_1

I then found a coordinating pattern paper (also from the Snow Day paper pack) and I liked how it was the same jade green as the snow flake pattern stripe and has smaller snow dots on it. I think it makes it flow nicely.

card_2_2

So going with the snow flake theme of the card I die cut three snow flakes from white card stock using the Simon Says Stamp Kate Snow Flake Craft Die which is very affordable at only $6.99USD (I love cheap things). And it’s so cute! I think it’s very versatile. I guess I’m lucky living in Australia as Christmas time is actually summer, so I’ll be able to cheat and use these dies again for actual ‘winter wishes’ cards in June and July.

card_2_3
I only put foam squares on one of the snow flakes. I placed the other two (the top and the bottom one) directly onto the pattern paper. I tried to arrange them in a way that was pleasing to the eye. The striped pattern paper on the left side is also raised with foam squares so I was able to tuck the bottom snow flake partially under the paper.

card_2_4

I was really happy with the look of this and as it had such a pretty delicate look with the snow flakes on the right-hand side I didn’t want to cover it up with a sentiment too much. I wanted the sentiment to be mostly on the stripes.

card_2_5

With stripes and snow flakes being the continuing theme, I made a tag out of striped pattern paper from the Snow Day paper pack with the same coordinating colours. After punching holes at each corner using the Big Bite 2, I used the Lawn Fawn Peppermint cord to thread through the holes creating the tag handle.

card_2_6

I adhered it to the card askew and placed one of the arms of the raised snowflake over the top of the tag.

card_2_7

I love the ‘Ho ho Ho’ sentiment stamp from Penny Black’s Whoooo’s Wishing Stamp Set and I thought the delicate italic/cursive ‘ho’ would tie in nicely with the delicate snow flakes. I used the Memento Dew Drop inks ‘Lady Bug’, ‘Cottage Ivy’ and ‘Teal Zeal’ on white card stock to stamp the sentiment. I overlaid the ‘Teal Zeal’ and ‘Cottage Ivy’ to try and get a colour closer to the jade green of the pattern papers. Then I adhered that on top of the tag.

card_2_8

I was really happy with the final result and my friend was really pleased when I presented it to her. I enjoy the crafting get-togethers with my friend a lot and I hope to have another real soon in the new year.

Christmas 2014 – Christmas Card Making – Lawn Fawn, Simon Says Stamp & Penny Black

I wanted to try and show a bit of the process when I am making cards. I think a lot of it just comes down to feelings and by this I mean, how I feel about certain colours, patterns and thus also the combination of colours & patterns. I’ll flip through the papers until something ‘jumps’ out at me. If I have some scrap pieces loose, I’ll shuffle them around on top of each other to see how different combinations will look as below:

yvette1

For this card, I decided to use the white-spotted, teal pattern paper with the white-polkadot, brown pattern paper and the multi-coloured diagonal striped pattern paper. All these papers are from the Lawn Fawn Snow Day 6 x 6 Paper Pack.

yvette2

I decided to stack the papers using the brown paper as a border between the vibrant snow-speckled teal paper and the multi-coloured diagonal striped paper. After umming and ahhing about whether or not to have the papers aligned vertically or horizontally, I finally decided with a horizontal card. I don’t really pre-plan cards before making. I start with the arrangement of papers and just go with the flow, I’ll look at it and wait for the inspiration to try new things. I am not a very adventurous person by nature and rarely try new things. I think I’m most adventurous in my artistry and that is my outlet for adventure. Sometimes I’ll try something I’ve done before, in a slightly different way. But at a restaurant I’ll always order the same thing.

On a previously made card I used the Big Bite II to create small holes that I could thread some cord through. In this card, I used the same technique but did it with a slight alteration. I also threaded the cord through some white cardstock cut into a ribbon banner with a sentiment stamped on it. I used the ‘be joyful’ sentiment stamp from the Simon Says Stamp Be Joyful Clear Stamp Set which I received in the Simon Says Stamp Card Kit for November 2014.

yvette3

It took me quite a lot of thinking to finally clasp onto the idea of using the happy snowman stamp from the Penny Black Whoooo’s Wishing Stamp Set. Basically, I brought a few different stamp sets and elements to the bottom right-hand side corner, as I knew I wanted to fill that space, and tried things. When I brought the Whoooo’s Wishing Stamp Set up next to the the ‘be joyful’ sentiment I thought the snowman looked exactly like he was filled with joy and wishing everyone to ‘be joyful’. So I stamped him on white card stock with black ink and cut him out; his arms were so skinny!

I traced his nose, mittens and scarf onto red card stock and then cut them out and adhered them with glue-pen and foam squares. I added some red rhinestones over his black buttons to add a bit more flare and sparkle.

yvette4

I was really happy with the way this card turned out. I made it for my best friend and I can imagine her in the same pose when filled with joy and wishing joy unto others. I wished her a happy Christmas filled with everything she desired and hoped her new year prosperous and her goals fulfilled.

I hope this card inspires you!

Christmas 2014 – Christmas Card Making – Lawn Fawn, Simon Says Stamp – Happy Holidays!

This card I originally made with the intention of giving it to my best friend, but I wasn’t wholly happy with the final result so I ended up making a different card to gift to her. This first photo is the rough assembly to see how everything looked together.

card_1_1

I had chose papers from the Lawn Fawn Snow Day 6 x 6 Paper Pack and stamped some Christmas trees using the Simon Says Stamp Be Joyful Stamp Set. The sentiment ‘Happy Holidays’ was also from the Simon Says Stamp Be Joyful Stamp Set. The cord is Lawn Fawn Peppermint Cord.

card_1_2

I used my Crop-a-dile Big Bite II to punch some holes either end of the cord to thread the Lawn Fawn Peppermint cord through.

Icard_1_3
I end up using the stamped trees as stencils, as I didn’t like the way the ink looked. I used the same red paper from the walrus Christmas scene card also from the Lawn Fawn Snow Day 6×6 Paper Pack.

I used foam squares to adhere the sentiment.

I tried to fill the blank space in the right-hand side corner with a bunny, but I still didn’t like the result. I ended up letting my partner give it to his Nan & Pop, so the card wasn’t wasted.

Christmas 2014 – Christmas Card Making – Lawn Fawn Arctic Critters Stamp

TaylorChristmas

This card is one of three cards I made at a friend’s house at a card making get-together. This is a really cute card and I immediately knew I wanted to give it to my cousin and aunt for Christmas (I guess my uncle too but boy’s don’t usually care for this kind of thing.)

I started this card by using Simon Says Stamp Christmas Scene Stencil, I drew around the slopes onto white card stock and then cut it out. I tried the slopes on a couple different pattern papers until I decided on the one pictured, as I thought it looked the best and helped with what I was wanting to accomplish in the scene.

After cutting the background pattern paper to size and adhering it, I stamped out the Walrus (which my friend and I continuously called a seal all night and were forever correcting ourselves) from the Lawn Fawn Arctic Critters Stamp Set. I did not have the co-ordinating dies at this stage so I simply cut it out with scissors. I used light grey pencils to colour him in and then used one of my friend’s textas to scratch in a bit of shading.

I stamped and cut out the hat separately, also from the Lawn Fawn Arctic Critters Stamp Set, and also coloured it in using the textas.

After looking at the scene I knew I wanted trees as it looked too bland and empty. I first tried to stamp some trees from a stamp set but didn’t really like it. My friend had some Christmas elements and had about four different Christmas trees. One was a red tree and I thought it looked really good. I wanted more than one tree though.

So I used the element as a stencil and I turned it over onto the backside of a red pattern paper from the Lawn Fawn Snow Day 6 x 6 Paper Pack and I traced around the edges and then cut the trees out with scissors. I positioned them and used foam stickers to get the dimension to the scene that I wanted.

And then I had another problem, there was an empty space in the top right-hand side corner. Well I didn’t have a sentiment yet? So I decided quickly on doing a ribbon banner and chose out the ‘Merry’ and ‘Christmas’ from the Simon Says Stamp Holiday Hellos Clear Stamp Set. I used Tuxedo Black Memento ink and then adhered the sentiment banner with foam tape.

I was very pleased with the result and I think the seal -oops! I mean, Walrus, looks super cute.

Christmas 2014 – Christmas Card Making – Simon Says Stamp Big Holiday Wishes

grandmachristmas

This is one of three cards I made with a friend at a card making get-together. I made this one for my grandma. I chose out the green mitten pattern card from the Lawn Fawn Snow Day 6 x 6 Paper Pack and a red pattern paper. I cut them to size not in equal halves and adhered them to the card base.

I stamped the sentiment ‘Sending Big Holiday Wishes’ from the Simon Says Stamp Big Holiday Wishes stamp set with green memento ink onto plain white card stock and I cut the card stock down to size. I positioned the sentiment on the card askew. I didn’t want the sentiment just by itself and if I pulled the sentiment to either side then the opposite side looked empty. So I adhered it to the left-hand side and then started on filling the right-hand side with embellishments.

I used the mitten stamps from the Simon Says Stamp Big Holiday Wishes stamp set with green memento ink to stamp the mittens and I cut them out with scissors. I then cut a small length of the Lawn Fawn Peppermint cord and adhered it to the mittens.I then positioned and adhered the mittens beside the sentiment.

I had left it like that for a while and it wasn’t until I was searching through my craft drawers at home that I found some old Christmas ribbon which I used to finish off the card and create a border between the green and red pattern paper on the card.

I think this card is fun and bold and really simple to make. I’m sure my grandma will love it.

I hope this card inspired you!

Christmas 2014 – Christmas Card Making – Basic Grey Evergreen Holly Jolly Paper

This is another card I made before starting my blog so I don’t have the photos during construction.This one I made with my favourite uncle in mind. I really liked the ‘Holly Jolly’ print pattern paper in the Basic Grey Evergreen 6 x 6 paper pack and decided on using that.

unclechristmas

Then I picked out some coordinating paper, a plain blue and an angled stripe pattern. All the colours go together perfectly. Basic Grey’s Evergreen series is obviously very well thought out with many combinations to use with all papers coordinating beautifully.

I decided early on to use the blue paper as a stripe to separate the bolder prints of the Holly Jolly and the stripes. It looked okay but I wanted to have a little more. So I stamped ‘Season’s Greetings’ either end of the blue stripe in red and green memento ink. There was enough of a gap in the middle of the two stamped sentiments to put a mistletoe stamp. The mistletoe stamp is a part of the Penny Black’s Whooo’s Wishing stamp set.

To stamp it, as the berries and leaves are one whole stamp, I had to first cover the berries with washi tape, then add the green ink to the leaves, then remove the washi tape and then finally stamp it down. I had to repeat this process with the berries. First covering the leaves with washi tape, then adding the red ink to the berries, then removing the washi tape, and then finally stamping it down. It took me a couple goes to get it right and I practiced first on a separate piece of scrap paper. I was happy with the results.

It still didn’t look completely finished. So I used some brown hemp cord to create a border top and bottom to the blue paper. And I finished with a little brown cord bow at the top corner with the scrap piece of cord I had left from the borders.

Overall, I was quite pleased with the results and process of making this card. This card has been posted to my uncle and I’m excited to hear from him to find how he liked the card.