Thinking of You – Winter Wishes – Simon Says Stamp January 2015 Card Kit Idea – Bo Bunny 6 x 6 Altitude Paper – Sparkly

Winter-Wishes-Card-Idea-Simon-Says-Stamp-January-2015-Card-Kit-Design-Kate-Snowflake-Die-Cut

This card I made with my father’s girlfriend in mind. She is very crafty also and is abundant in creativity; she has an eye for design. So I wanted to make sure this card had nice design elements to it as well as some flair!Winter-Wishes-Card-Idea-Simon-Says-Stamp-January-2015-Card-Kit-Design-Kate-Snowflake-Die-Cut

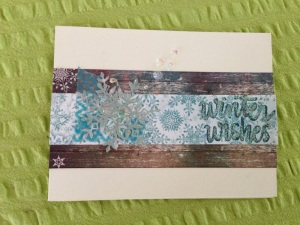
I used a cream coloured card base and adhered a stripe of pattern paper with a beautiful wood and snowflake design and then I cut a strip of pattern paper with a white and blue repeated snowflake pattern, which looks very delicate and magical, and I adhered that in the center of the wood pattern paper.

I cut two snowflakes with the Simon Says Stamp Kate snowflake die, one on a light grey pattern paper and one on a light blue pattern paper; all from the Bo Bunny Altitude Collection of 6 x 6 papers included in the Simon Says Stamp January 2015 Card Kit. I adhered them one on top of each other over two strips of blue and clear chevron pattern washi tape. To jazz it all up a bit I went over the snowflakes with the wink of stella clear glitter pens and then took it further with the clear stickles glitter glue and I added frosting on the top most snowflake and added some droplets leading out diagonally to the top of the card. I also added some sequins to the clusters leading out from the snowflake and put one sequin in the center of the top snowflake. I really love how the whole feature turned out.

Winter-Wishes-Card-Idea-Simon-Says-Stamp-Snowflake-Scrapbook-Glitter-Sparkle-Stickles-Glue


With the sentiment I put it to the opposite side of the feature and I used Memento Teal Zeal ink with the ‘Winter Wishes’ sentiment stamp from the ‘Hand Lettered Winter Wishes’ stamp set. I went over the sentiment with the clear stickles to really make the card sparkle!

Thinking of You – Winter Wishes – Simon Says Stamp January 2015 Card Kit Idea – Bo Bunny 6 x 6 Altitude Paper – Messy

Winter-Wishes-Simon-Says-Stamp-January-2015-Card-Kit-Snow-Flake-Design-Idea-Bo-Bunny-Altitude


This card I made for my partner’s mother while at my friend’s house using supplies from the Simon Says Stamp January Card Kit with a couple extras such as the Simon Says Stamp Kate Snowflake die, the black liquid pearl I received with the March 2015 Card Kit and some blue pattern washi tape.

Winter-Wishes-Simon-Says-Stamp-January-2015-Card-Kit-Snow-Flake-Design-Idea-Bo-Bunny-Altitude

I adhered the pattern paper from the Bo Bunny Altitude collection onto the grey card base at on angle on the top half of the card. I added the blue pattern washi tape underneath to create a border. Then I cut out a cream, purple and grey pattern snowflake using the Kate snowflake die cut with the Big Shot machine. I stamped the ‘Winter Wishes’ using Tuxedo Black Memento ink to the right-hand side. I then laid out the snowflakes on the left-hand side.

Winter-Wishes-Simon-Says-Stamp-January-2015-Card-Kit-Snow-Flake-Design-Idea-Bo-Bunny-Altitude


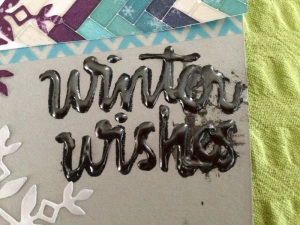
I didn’t feel like the Memento Ink by itself was really enough, it didn’t have the effect I wanted. So I used the black liquid pearls (which I’ve never used before) and I went over the cursive writing of the sentiment. This next part makes me very sad as I’m sure you can see in the photos…

I stood the card up to let it dry and went to place it at the end of the table and it slipped and fell diagonally into my fiskars paper trimmer… and the liquid pearl smudged heaps. There was no way to fix it. And I had used scraps to create this card so I couldn’t make another to look the same as I didn’t have the supplies. Oh my goodness the liquid pearl takes so long to dry! I watched about 5 episodes of Dharma and Greg with my friend and it still wasn’t dry by the end of the marathon.

Even though this card has been messed up beyond repair, I still plan to give this card to my partner’s mother and I think she’ll get a kick out of the quirkiness of the card and that extra, home made feel of the unique mistake.

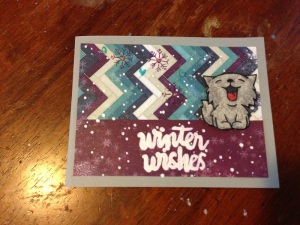
Thinking of You – Winter Wishes – Simon Says Stamp January 2015 Card Kit Idea – Bo Bunny 6 x 6 Altitude Paper with Paper Smooches 9 Lives Cute Cat Stamp

Simon-Says-Stamp-Card-Kit-2015-January-Winter-Wishes-Bo-Bunny-Altitude-Pattern-Paper-Grey-Cardstock

I had a very quiet night at work the other night, so I started making another winter wishes card using the materials in the Simon Says Stamp January 2015 card kit. I started by cutting a card base from some of the gray cardstock included in the kit and folded it using the Martha Steward Bone Scorer.

Simon-Says-Stamp-Card-Kit-2015-January-Winter-Wishes-Bo-Bunny-Altitude-Pattern-Paper-Grey-Cardstock

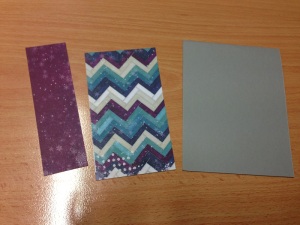
Then I chose out some pieces. The initial idea was to have a strip of the purple on the left-hand side of the grey card stock then I built on there by adding a coordinating piece that has the same purple and snowflake pattern in a zig-zag chevron pattern design.

Simon-Says-Stamp-Card-Kit-2015-January-Winter-Wishes-Bo-Bunny-Altitude-Pattern-Paper-Grey-Cardstock

I first adhered the chevron pattern paper down on the right-hand side simply using a glue runner. I prefer the Scotch Advanced Tape Glider. I’ve got the large pink one and I love how easy it is to use and the fact that you can buy refills for it which makes it really good value for money because you don’t actually have to purchase the refills very often at all and they aren’t very expensive so you get a lot of bang for your buck.

Simon-Says-Stamp-Card-Kit-2015-January-Winter-Wishes-Bo-Bunny-Altitude-Pattern-Paper-Grey-Cardstock

Next I adhered the purple strip on the left-hand side and I really liked this but didn’t know where to go from there and I didn’t want to make another card with a tag design. I tried some of the postage stamps included in the kit but none of them looked good anywhere so they were put back on their sheet and put away. I went over the entire purple strip and the purple zigzags on the opposite pattern paper with the wink of stella clear glitter pen. I decided I wanted even more glitter so I added the clear glitter to a couple more random zigzags, but not many more.

Simon-Says-Stamp-Card-Kit-2015-January-Winter-Wishes-Bo-Bunny-Altitude-Pattern-Paper-Grey-Cardstock

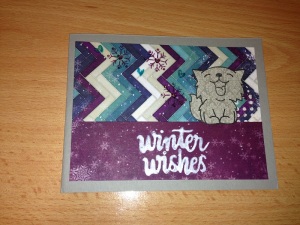
Finally I decided to turn the card horizontal. I stamped out the nine lives cute cat from the Paper Smooches 9 Lives Stamp Set onto some of the Authentique Classic Beauty grey pattern paper that is from the Simon Says Stamp March 2015 Card Kit, which has been my favourite kit so far. I fussy cut the cat out and sat him on the border line between the two pattern papers. And then I used the Tim Holtz Distress inks in the Seedless Preserve and Peacock Feathers hues to stamp some love hearts and snow flakes from the Simon Says Stamp Hand Lettered Winter Wishes stamp set that is included in the Simon Says Stamp January 2015 Card Kit. I also stamped the sentiment ‘winter wishes’ using the white Simon Says Stamp ink on the bottom purple banner. After I had the snow flakes and love hearts on and dry, I went over the hearts and dots on the snow flakes with the stickles diamond glitter glue. I don’t know why but I wanted this card to really shine and sparkle!

Simon-Says-Stamp-Card-Kit-2015-January-Winter-Wishes-Bo-Bunny-Altitude-Pattern-Paper-Grey-Cardstock

The Simon Says Stamp white ink looked really terrible on the pattern paper when it dried and it was a horrible light pink and so I thought the best way to fix that was to go over the ink with white paint. I completed these next steps at home as I didn’t have the materials at work to do so. Going over the winter wishes sentiment in white acrylic paint made the white a lot crisper and also gave it a more hand-written/hand-made quality. You can really see the difference between the white paint on the ‘w’ and the rest of the sentiment.

Simon-Says-Stamp-Card-Kit-2015-January-Winter-Wishes-Bo-Bunny-Altitude-Pattern-Paper-Grey-Cardstock

I had some white paint spare after finishing the sentiment so I decided to make some bright dots all over the card as some snowflakes and added interest and I went a little nuts with it, I’ll admit.

Simon-Says-Stamp-Card-Kit-2015-March-Authentique-Classic-Beauty-Grey-Pattern-Paper-Cute-Paper-Smooches-Cat-Stamp

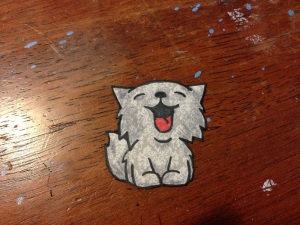
The last thing to do was to finish the cute little grey kitten off and adhere him to the card. My standard technique of using the gunmetal grey colour from the Derwent Studio Pencils to add some value to his tail, body and face. And then I went over all the black lines using the Memento Tuxedo Black ink pen and coloured in the red of his tongue using the red Memento ink pen.

Simon-Says-Stamp-Card-Kit-2015-March-Authentique-Classic-Beauty-Grey-Pattern-Paper-Cute-Paper-Smooches-Cat-Stamp


I adhered the cute anime style cat to the card using foam squares for a little extra pop and dimension. I stamped on the inside of the card ‘Thinking of You’ from the same Simon Says Stamp Hand Lettered Witner Wishes stamp set using versafine black ink as it is really crisp. I plan to gift this card to my partner’s mother.

Thank You Card – Winter Wishes – Simon Says Stamp January 2015 Card Kit Idea – Bo Bunny 6 x 6 Altitude Paper

Winter-Wishes-Bo-Bunny-Altitude-Simon-Says-Stamp-Card-Kit-Thank-You-Card-Idea

This card I made for my aunt as a Thank You Card as she had sent me a card and a bookmark. I hadn’t made a card for her since Easter so hopefully this will come as a nice surprise. I used the scraps pieces of pattern paper left over from the card I made for my grandma,  you can check that card out by clicking here.

Winter-Wishes-Bo-Bunny-Altitude-Simon-Says-Stamp-Card-Kit-Thank-You-Card-Idea

The card is simple with the sentiment stamped directly to the background pattern paper using versafine black ink. The sentiment from the Simon Says Stamp Hand Lettered Winter Wishes stamp set as are the extra black and purple stamps of stars and snowflakes. I used the left over purple and attached one of the stamp stickers that says “Hello Snow”. I cut two ribbons from the light blue scraps and adhered them under the purple square.

On the inside I stamped ‘Thanks’. And that was it!

Birthday Card Making – Paper Smooches Nine Lives Cute Cat Stamp with Teresa Collins He Said/She Said Pattern Paper

simon-says-stamp-card-kit-march-2015-authentique-classic-beauty-card-stock

I started this card with a warm-toned beige cardstock from the Simon Says Stamp March 2015 Card Kit which I cut to size and then used the Martha Stewart Scoring Board to score a line in the middle and fold the cardstock in half to create my card base.teresa-collins-designs-he-said-she-said-orange-scrapbook-pattern-paper
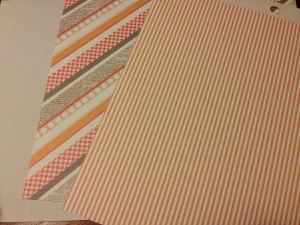
Next I chose the pattern papers I would use on the card. I wanted to do something different from the norm and I had a bit more time to waste on this card having the night off work and no one was at home, so I took my time with it and had a lot of fun.
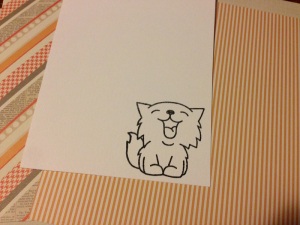
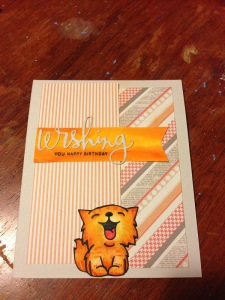
paper-smooches-nine-lives-cute-happy-smiling-anime-cat-craft-stampThe papers are from a Teresa Collins 6×6 paper pad called ‘He Said She Said’ and I chose two coordinating pattern papers with orange. I was making this card as a birthday present for a friend who happens to be red-headed and happens to also really like the colour orange, so I tried to make the card as ‘ginger’ as possible.
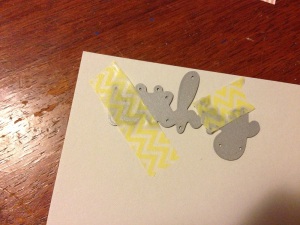
big-shot-die-cut-machine-yellow-washi-tape-adhesive-scrapbook-card-making-craftI wanted to try a few new things with this card and I hadn’t used the new die cuts I had purchased from Simon Says Stamp that I really wanted. I purchased the Simon Says Dies and Stamps From Me To You Set FMY175 Better Together a while ago as the set has many elements that I think are very versatile.
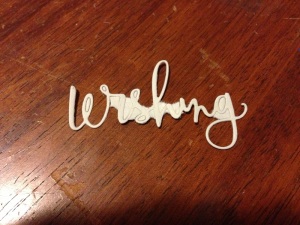
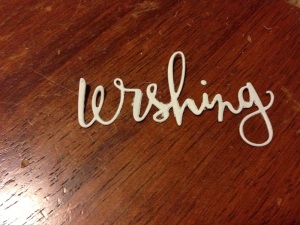
simon-says-stamp-wishing-sentiment-die-cut-big-shot-machineIf you like haul posts, you can check out the post I made for when I got Better Together Simon Says Stamp Die & Stamp set by clicking here. Unfortunately my Big Shot didn’t cut it out properly and I had already packed the Big Shot back away and didn’t want to get up again to run it back through…
simon-says-stamp-wishing-sentiment-die-cut-big-shot-machine-scissors-touch-up

…So I decided to just try and fussy cut the rest out to touch it up a bit. I think it has a nice, ‘hand-made’ look to it. Haha!
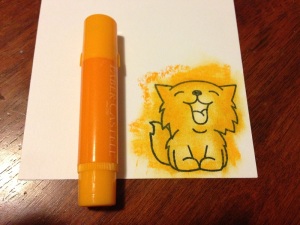
plain-cardstock-cute-cat-stamp-paper-smooches-faber-castell-gelatos-orange-card-idea

I have always loved this happy anime-style cat from the Paper Smooches Nine Lives stamp set. I stamped him out onto white card stock then I decided to colour him in using some orange Faber-Castell Gelatos.
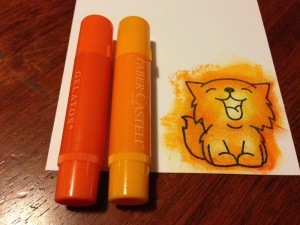
plain-cardstock-cute-cat-stamp-paper-smooches-faber-castell-gelatos-dark-orange-card-idea

I drew some gelatos around the edges in the lighter orange and rubbed it in using my finger and then added some value by repeating the process with the dark orange. I was really excited by how the cat was looking.
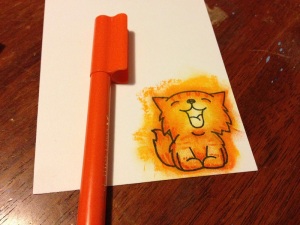
Plain-Cardstock-Cute-Cat-Stamp-Paper-Smooches-Faber-Castell-Connector-Pen-Dark-Orange-Card-Idea

Next I used a darker orange Faber Castell Connector-Pen to make some darker values and to give the ginger cat some little tiger stripes. So cute!
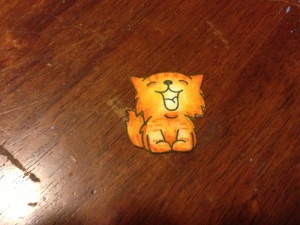
Plain-Cardstock-Cute-Cat-Stamp-Paper-Smooches-Faber-Castell-Connector-Pen-Dark-Orange-Card-Idea

After that I fussy cut him out and went around the edges using the Memento Tuxedo Black ink pen. I cut out a ribbon from some plain white cardstock and then coloured it using the same two Faber Castell Gelatos that I had used to colour in the cat.
Simon-Says-Stamp-Wishing-Die-Cut-Happy-Birthday-Stamp-Set-Faber-Castell-Gelatos-Orange

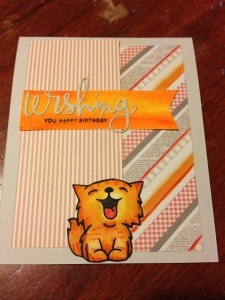
I cut the pattern papers in two halves and aligned them on the card disjointed. I arranged the cat on the bottom to cover the bottom joint. I really liked this effect. I arranged the ‘wishing’ die cut on top of the ribbon and adhered it using a glue pen. Then I stamped ‘you happy birthday’ from the same stamp set underneath using Versafine black ink – it’s very crisp!
Simon-Says-Stamp-Wishing-Die-Cut-Happy-Birthday-Stamp-Set-Faber-Castell-Gelatos-Orange

Because the pattern paper was a little bit dull in comparison to the orange of the gelatos on the cat and the ribbon, I decided to rub some gelatos down the thicker stripes of the right-hand side pattern paper and added a scratched line in the dark orange of the Faber Castell Connector Pen. I think this really finished the card off nicely and brought everything together.

I really love how this card turned out and I can’t wait to try this gelatos colouring idea again in the future. I would also like to make more cards using the Simon Says Stamp Better Together set.

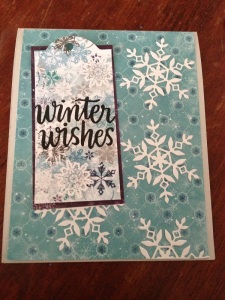
Thinking of You – Winter Wishes – Simon Says Stamp January 2015 Card Kit Idea – Bo Bunny 6 x 6 Altitude Paper

simon-says-stamp-january-card-kit-2015-winter-wishes-card-idea-kate-snowflake-die-cut

I had the Simon Says Stamp card kit for January 2015 stashed away, as I’m in Australia it’s actually really hot around January so Winter Wishes cards and snowflakes don’t actually make a lot of sense at that time of the year.

Now that it’s June, it makes more sense being that it’s so chilly out. Definitely sweater weather. I made this card to send down to my Grandma. I often think of her and she loves receiving cards and letters, especially handmade ones.

I used a lighter grey card stock for the base and then I cut some of the lighter blue pattern paper with the circle I wanted to make sure I had the circle pattern as even as possible.

I then made a tag for the sentiment from the snowflake pattern paper and gave it a backing of the purple pattern paper. All the papers were from the Bo Bunny Altitude Collection that is in the SSS January 2015 Card Kit.

I used my Big Bite to punch the hole to finish the tag. I only adhered the snowflake pattern paper in the middle so that it curves at the top and bottom for a little extra interest. I stamped the ‘Winter Wishes’ sentiment using the ‘hand lettered winter wishes’ exclusive Simon Says Clear Stamp.

Simon-Says-Stamp-January-Card-Kit-2015-Winter-Wishes-Card-Idea-Thinking-Of-You

I also stamped ‘thinking of you’ inside the card and decorated the inside a little with some of the small love heart and snowflake stamps. I think it’s a nice effect. To finish the wintery look, I die cut some snow flakes out of white card stock using the Simon Says Stamp Kate Snowflake Die and my Big Shot Die Cut Machine. I cut three out and cut one of them in half after I fiddled around with the arrangement for a while I decided this was the best way. I adhered the snowflakes using a glue pen and tweezers.

I was very happy with the results and I can’t wait for her to receive it in the mail.