Christmas 2015 – Christmas Card Making – Lawn Fawn Cute Bunny Merry Christmas Card Idea with Snowflakes

Lawn-Fawn-Cute-Christmas-Card-Idea-Merry-Snowflake-Bunny-Rabbit-Snow-Critters-Stamp-Die-Cut-Kawaii-Bow

This card is super kawaii, which is fantastic because I’ve posted this card off to Japan!

I made this card for one of my Japanese friends, so I put extra effort into make this one cute (or kawaii). Using the adorable bunny pattern paper from the Lawn Fawn Snow Day 6×6 paper pad, I adhered that directly to some card stock.

Then using plain white card stock, I created a scalloped border using the Fiskars scallop border punch. I adhered this strip to the bottom center of the car using foam squares after wrapping some candy red and white striped twine around the bottom and tying a bow. It was a two person operation to get that cord and bow on there so pretty! I had my friend help by holding the paper and the strands straight while I fumbled with the bow! Haha!Lawn-Fawn-Cute-Christmas-Card-Idea-Merry-Snowflake-Bunny-Rabbit-Snow-Critters-Stamp-Die-Cut-Kawaii-Bow

After stamping the sentiment using “Merry” & “Christmas” from the Simon Says Stamp Christmas Sentiments set in Tim Holtz red inks, I found I had smudged a bit of red on top of the page. At first I wanted to try and cover it up using the bunny I had stamped with Memento Tuxedo Black Ink from the Lawn Fawn Arctic Critters stamp set, but I didn’t like the look of the bunny in that position. So I placed the bunny over the CH of the “Christmas”.


Lawn-Fawn-Cute-Christmas-Card-Idea-Merry-Snowflake-Bunny-Rabbit-Snow-Critters-Stamp-Die-Cut-Kawaii-Bow

Instead to cover up my boo-boo, I stamped some snowflakes, also using the Lawn Fawn Arctic Critters stamp set, die cut them out and then adhered them over the marks using foam squares. And I’m pleased with the final results! I hope she likes it and get at least as much enjoyment as I got from making the card.

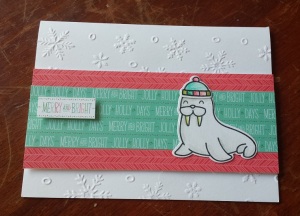
Christmas 2015 – Christmas Card Making – Lawn Fawn Cute Walrus Arctic Critter Stamp Merry Christmas Card Idea with Snowflakes

Lawn-Fawn-Cute-Adorable-Christmas-Card-Idea-Easy-Sparkly-Glitter-Arctic-Critters-Stamp-Snow-Day-Paper

This card is by far my favourite so far of all the Christmas cards I’ve made this season. I made this card for my younger brother. IT IS SO GOSH DARN KAWAII!!!

Lawn-Fawn-Cute-Adorable-Christmas-Card-Idea-Easy-Sparkly-Glitter-Arctic-Critters-Stamp-Snow-Day-Paper

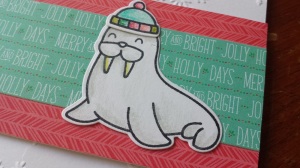
That Walrus! (o^_____^o) Hahaha!

I made this card using similar techniques to the owl card in a previous post. I used the Darice embossing card to emboss some white card stock with a snowflake pattern.

And then using scraps left over from the Lawn Fawn Snow Day 6×6 paper pad, I arranged some strips in the bottom centre of the card horizontally.

I stamped the walrus and his adorable hat from the Lawn Fawn Arctic Critters stamp set onto white card stock in Memento Tuxedo Black Ink and then die cut him and his hat out using the matching Lawn Fawn Arctic Critters die cuts in the Sizzix Big Shot.

I coloured him in using Derwent Studio Pencils. The colours of the hat were picked to match the colours in the Lawn Fawn Snow Day pattern paper. I then adhered him flat to the horizontal pattern paper strips.

Lawn-Fawn-Cute-Adorable-Christmas-Card-Idea-Easy-Sparkly-Glitter-Arctic-Critters-Stamp-Snow-Day-Paper

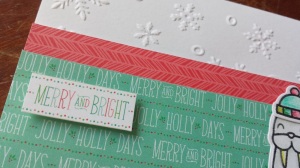
 I used another cut out of the “Merry and Bright” pattern paper, a design also from the the owl card, and adhered that as my sentiment with foam squares.

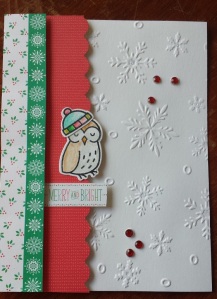
Christmas 2015 – Christmas Card Making – Lawn Fawn Cute Owl Merry Christmas Card Idea with Snowflakes


Lawn-Fawn-Snow-Day-Cute-Adorable-Kawaii-Card-Idea-Easy-Simple-Owl-Critters-Arctic-Stamp-Die-Cut-Merry

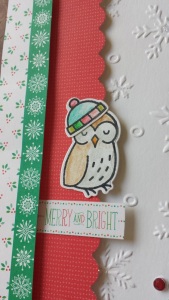
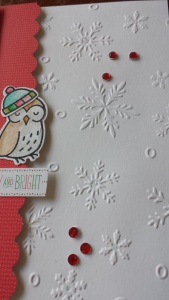
This card I made by first embossing some plain white card stock using snowflake pattern embossing sheet from Darice. Then using some strips of scrap pattern paper from the Lawn Fawn Snow Day 6×6 paper pad, I cut one straight strip, which is the white pattern with holly berries and the green pattern with snowflakes and then I cut one using the Fiskers scallop edge punch.

Lawn-Fawn-Snow-Day-Cute-Adorable-Kawaii-Card-Idea-Easy-Simple-Owl-Critters-Arctic-Stamp-Die-Cut-Merry

I adhered the scalloped edge first with foam squares and then the straight edge on top of the scallop also with foam squares. I wanted double wammy pop out effect! I stamped the owl and the hat using the Lawn Fawn Arctic Critters stamp set and Memento Tuxedo Black Ink. I die cut the owl and hat out using the matching Lawn Fawn Arctic Critters dies set and the Sizzix Big Shot.

I coloured in the owl brownish, I wanted to try something new and I haven’t coloured in one of the owl stamps brown before and I really like the way it turned out. Adorable little tawny owl! I also coloured in the hat using colours matching the Lawn Fawn Snow Day pattern paper. I used Derwent Studio Pencils.

Lawn-Fawn-Snow-Day-Cute-Adorable-Kawaii-Card-Idea-Easy-Simple-Owl-Critters-Arctic-Stamp-Die-Cut-Merry

And to finish it all off, I put a couple clusters of red rhinestones and I fussy cut out “Merry and Bright” from a Lawn Fawn Snow Day pattern paper scrap. I’m really happy with this card!

Christmas 2015 – Christmas Card Making – Simon Says Stamp Card Kit December 2013 – Merry Kissmas Kawaii Deer Idea

Merry-Kissmas-Simon-Says-Stamp-Christmas-Card-Kit-Idea-Simple-Easy-Sparkle-Glitter-Cute-Adorable-Sweet

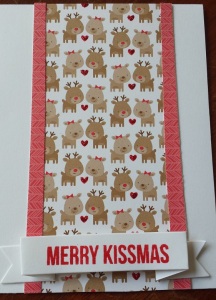
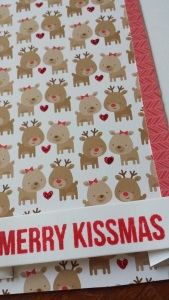
I love the cute deer pattern paper from Doodlebug that was in the Simon Says Stamp Card Kit December 2013! I was digging through my stash and I located a lot of Christmas themed papers not just in the Simon Says Stamp Card Kit for December 2013 but also from Lawn Fawn Snow Day 6×6 paper pad. Which I used some scrap strips of red pattern paper from the Lawn Fawn Snow Day papers to create the borders on the side of the cut deer pattern paper from Doodlebug.

Merry-Kissmas-Simon-Says-Stamp-Christmas-Card-Kit-Idea-Simple-Easy-Sparkle-Glitter-Cute-Adorable-Sweet

This card is super simple and easy to make but I had a blast making it. The cuteness overload made me so hyper happy! I finished this card off by stamping “Merry Kissmas” on a die cut banner from plain cardstock. The “Merry Kissmas” sentiment is a stamp from Simon Says Stamp Big Holiday Wishes and the banner was made from a die cut also from Simon Says Stamp. I added a little bit of extra sparkle by using the Stickles Christmas Red to go over the little red love hearts. This is so super cute and I can’t wait to gift it to my partner with a kiss! (o^-^o)

Christmas 2015 – Christmas Card Making – Lawn Fawn It Moose Be Christmas Cute & Sparkly Card Idea

It-Moose-Be-Christmas-Simon-Says-Stamp-Lawn-Fawn-Arctic-Critters-Card-Idea-Echo-Park-Stickles-Diamond-Glitter-Cute

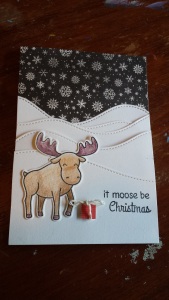
This card is one of my favourite Christmas cards! I made this one for my uncle. I always love the Lawn Fawn moose from the Artic Critters stamp set. He’s so adorable!!

It-Moose-Be-Christmas-Simon-Says-Stamp-Lawn-Fawn-Arctic-Critters-Card-Idea-Echo-Park-Stickles-Diamond-Glitter-Cute

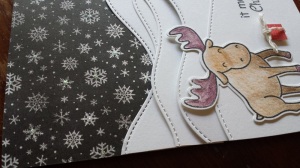
I used the black and white snowflake pattern paper from Echo Park Christmas Cheer collection and I adhered that directly to a black card. Then I die cut a whole bunch of slopes using the stitched hillside die cuts from Lawn Fawn. I used foam squares and regular tape adhesive to stick the slopes on top of each other to create some dimension and interest. I then went through with my diamond stickles and added in a whole bunch of drops to the centers of of the snowflakes to create some lovely sparkle!

It-Moose-Be-Christmas-Simon-Says-Stamp-Lawn-Fawn-Arctic-Critters-Card-Idea-Echo-Park-Stickles-Diamond-Glitter-Cute

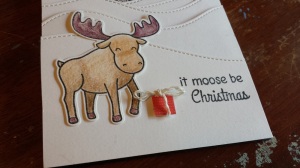
And to finish the card off, I placed the moose that had been die cut out using the matching die cut set and then coloured in using Derwent coloured pencils, to the bottom left of the card. I used a scrap of red pattern paper and tied some white cord around it into a bow and adhered it in front of the moose. And then lastly I stamped the sentiment! I used the ‘it moose be’ from the Lawn Fawn Arctic Critters stamp set and the ‘Christmas’ is from the Simon Says Stamp Christmas sentiments set.

Birthday Card Making – Basic Grey Card Kit- Herbs & Honey – Arielle Gordon Design – Berry Sweet Triangle Card

Basic-Grey-Herbs-&-Honey-Pattern-Paper-6-x-6-pad-strawberry-birthday-greeting-card-arielle-gordon-design-idea


This card I made with my mother-in-law in mind, as her birthday is in this month. Unfortunately, I have had very little time lately and I have been struggling to find even 10 minutes of spare time to do some crafts. So I made time to make this card while at work on my break. I have been very fortunate to have the Basic Grey Card Kits for the Herbs & Honey collection and Grand Bazaar collection as they come with card ideas and instructions to build those cards from designers. Designing a card and thinking of the idea is the the thing that is most time consuming for card making and scrapbooking – or any art, I believe. So it was great to be able to choose a design and just put it all together in a flash. It meant I didn’t have the stress of feeling like I was against the clock.

Basic-Grey-Herbs-&-Honey-Pattern-Paper-6-x-6-pad-strawberry-birthday-greeting-card-arielle-gordon-design-idea


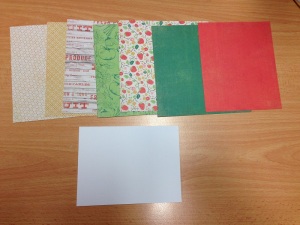
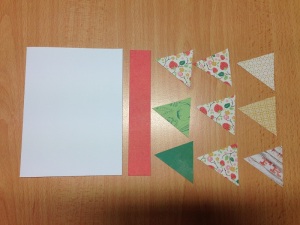
This card design is credited to Arielle Gordon and is very cleverly put together. First I read through the supplies list and gathered all the pattern papers listed and I prepared the card base. Then using the ‘berry sweet’ sticker from the title stickers which is in a triangle shape I cut a template. I then used that template to cut one triangle of each pattern and four triangles for the strawberry pattern paper. A strip of a bout an inch of red was also needed.

Basic-Grey-Herbs-&-Honey-Pattern-Paper-6-x-6-pad-strawberry-birthday-greeting-card-arielle-gordon-design-idea


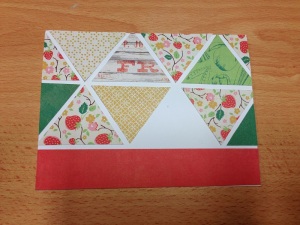
From there the triangles are used to form a pattern. When I was cutting out the triangles I tried to put the triangle over the parts of the pattern that I liked more. Such as the FR from the wood and red text pattern paper and the sweet peas of the green vegetable pattern paper. The strip of red paper was placed at the bottom as a border. The blank space is for the ‘berry sweet’ sticker that was used for the template.

Basic-Grey-Herbs-&-Honey-Pattern-Paper-6-x-6-pad-strawberry-birthday-greeting-card-arielle-gordon-design-idea


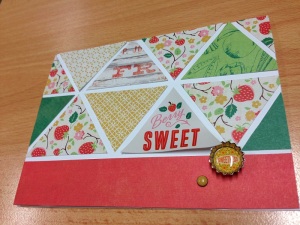
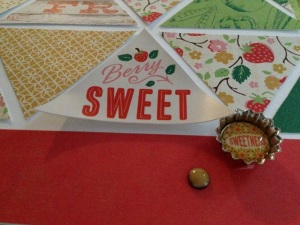
The instructions called for using a striped bottle cap and the little yellow brad. I used the little yellow brad as instructed but decided to swap out the striped bottle cap for the yellow sweetness bottle cap instead. I thought it made the card a little sweeter. Tee hee (o^-^o)

Basic-Grey-Herbs-&-Honey-Pattern-Paper-6-x-6-pad-strawberry-birthday-greeting-card-arielle-gordon-design-idea


I didn’t have my foam squares with me when I was at work so when I got back home I took 10 seconds to cut a square from my foam tape roll and used that to adhere the ‘berry sweet’ sticker. The instructions also advise to use a corner punch to round off the corners of the red border. But I liked the crisp edges so I left it angled.  I felt so inspired after making this card and I’d love to recreate this technique using different pattern papers and maybe different sized triangles or shapes. I think I might have to invest in a triangle punch or set of die cuts to speed the process along a bit.

Birthday Card Making – Basic Grey Card Kit- Herbs & Honey – Arielle Gordon Design

blank-card-stock-beginnings-of-a-card-making-idea-birthday-card-for-dad-father-the-old-man-simpleThis card I made for my father’s birthday using one of Arielle Gordon’s designs from the Basic Grey Herbs & Honey card kit. I think it’s perfect as he’s really into the old school and retro. I began with a white card stock base and trimmed it down from the 12 inch by 12 inch included in the card kit.

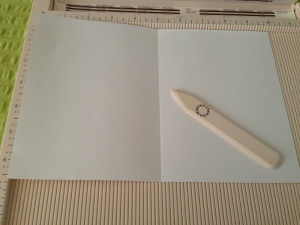
blank-card-making-card-base-martha-stewart-bone-scoring-horizontal-scrapbook-stockI used the Martha Stewart Score Board and bone scorer and made the card top folding.

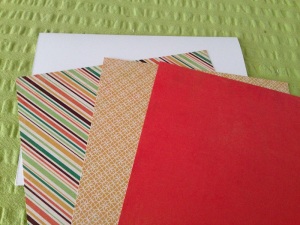
Basic-Grey-Herbs-&-Honey-Pattern-Paper-6-x-6-paper-pad-birthday-card-kit-greeting-simple-idea-designI gathered the pattern papers as advised in the instructions and then I trimmed them down. All the measurements are included in the design instructions.

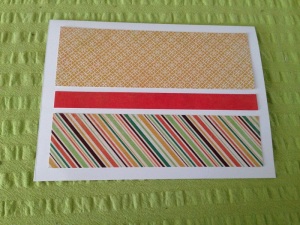
Basic-Grey-Herbs-&-Honey-Pattern-Paper-rule-of-three-design-principle-card-kit-idea-BG-simple-cleanOnce I had the strips I adhered them to the card. But when I tried to place the banner sticker from the the Herbs & Honey Title Sticker Sheet, included in the kit, I found that I had the gaps between the strips to wide so I had peel the strips off and re-adhere them closer together.

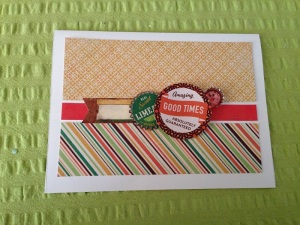
Basic-Grey-Herbs-&-Honey-Card-Kit-Arielle-Gordon-Design-Idea-Imitation-For-Dad-Birthday-Hand-MadeAfter that I could place the banner down. In the instructions and the example image they use the whole sticker, but as most of the right hand side of the sticker is covered and you can only just see the bottom spike on the right hand side sticking out I decided I’d cut the banner in half and only use half the sticker.

The instructions called for the two of the bottlecaps, one made from chipboard and the other metal. And then strategically placed in the middle of these two bottlecaps was a sticker also from the Title Stickers Sheet. The photo doesn’t show it but there was also a small brad placed between and below the green bottlecap and the good times sticker.

My younger brother and I signed the inside and wished my father well for his birthday and then it was speedily posted off. Even though we tried to get it all done on time, it is going to get to him late, especially as he lives three states down and has an ocean border.

I’ve really been enjoying making these card kit cards and it really helping me get a greater feel for designing as a lot of the times it takes me ages to come up with an idea and I always forget about the principles, such as the rule of threes, when designing.

I think I should study the principles of design more in order to make the simple & clean designs that I love and gravitate to so much.

Happy Birthday Dad! Hope you had a great day!

Birthday Card Making – Newtons Nook Birthday Card Idea – Shiny Gold Card – Basic Grey Plumeria & Mint Julep

Basic-Grey-Plumeria-Gold-Brown-Shiny-Birthday-Card-Idea-Newtons-Nook-Dream-Of-Paris-Acrylic-Stamp

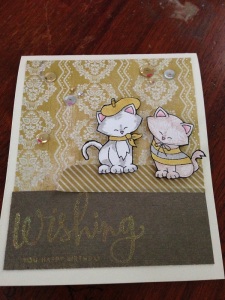
This is a super cute and flashy birthday card I made using the Newtons Nook Newton Dreams of Paris stamp set and a whole bunch of elements with sparkle for my partner’s younger brother.

Basic-Grey-Plumeria-Gold-Brown-Shiny-Birthday-Card-Idea-Newtons-Nook-Dream-Of-Paris-Acrylic-Stamp


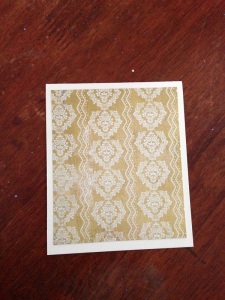
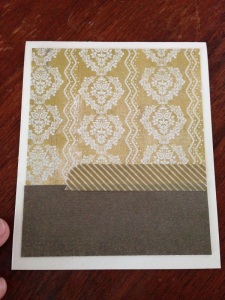
I started with a gold background pattern paper which made me think of wallpaper. This is from the Basic Grey Plumeria collection and I trimmed it down to size from 6 x 6 paper pad. I adhered it directly to a creamy gold card stock that was in the Simon Says Stamp March 2015 Card Kit.

Basic-Grey-Plumeria-Gold-Brown-Shiny-Birthday-Card-Idea-Newtons-Nook-Dream-Of-Paris-Acrylic-Stamp

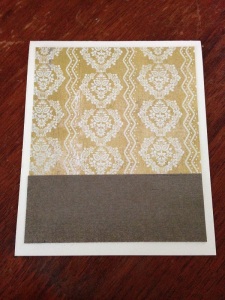
I really wanted to use brown with this as I was going to use some brown ribbon that I had spare. I found a nice chocolate brown in the Basic Grey Mint Julep collection. I trimmed a rectangle from a 12 x 12 inch pattern paper and adhered it over the gold using advanced tape glider.

Basic-Grey-Plumeria-Gold-Brown-Shiny-Birthday-Card-Idea-Newtons-Nook-Dream-Of-Paris-Acrylic-Stamp

I have a roll of gold striped washi tape and I tore strip off and just slapped that onto the right-hand side edge. This would be where I would place the kittens/cats when they were done.

Basic-Grey-Plumeria-Gold-Brown-Shiny-Birthday-Card-Idea-Newtons-Nook-Dream-Of-Paris-Acrylic-Stamp

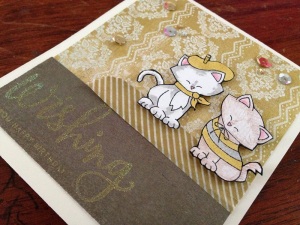
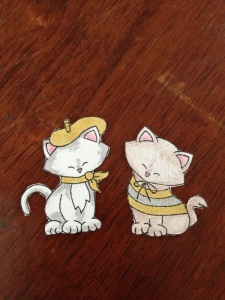
The kittens/cats I stamped using Memento Tuxedo Black Ink – this time I waited for it to dry instead of rushing in and smudging it everywhere with my fingers. I used Derwent Studio coloured pencils in gun metal grey and vandyke brown to add some colour and shading to each kitty. I used pink madder lake for the ears and nose. After fussy cutting the kittens out I went over the edges using the Memento Tuxedo Black Ink Pen. And then I had the brilliant (in my humble opinion) idea of using the wink of stella glitter pens in gold and silver to add a bit more sparkle to the card and characters. I used the gold to colour in the hat scarf and two stripes of the shirt and then the silver to go over the gun metal grey portions of the grey/white kitty and also the middle stripe of the shift on the right-hand side cat. So cute! I really like how this pair turned out.

Basic-Grey-Plumeria-Gold-Brown-Shiny-Birthday-Card-Idea-Newtons-Nook-Dream-Of-Paris-Acrylic-Stamp


Once the kittens were complete I adhered them to the card on top of the washi tape using foam tape for a bit more dimension. Lastly, I used the Simon Says Stamp Better Together ‘wishing’ and ‘you happy birthday’ stamps with embossing ink and some glittery gold embossing powder. On some angles you can’t actually see the sentiments and on others it lights up so brilliantly. It wasn’t the effect I was originally looking for but I think it works well. I had some gold and silver sequins which I adhered here and there on the background for some extra sparkle and interest. And that’s it! Let me know what you think by leaving me a comment.

123Stitch.com Lawn Fawn Stamp and Craft Dies Supplies Haul or Package

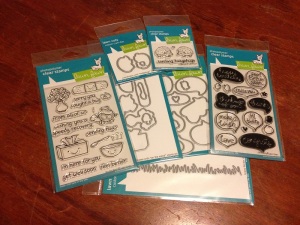
Lawn-Fawn-Clear-Stamps-Craft-Dies-Hedgehugs-Get-Well-Soon-Thanks-Feel-Better-Hi-GrassPeople keep getting sick at work with the cold or flu and I’d like to be able to make some ‘get well soon’ and ‘feel better’ cards without having to hand write the sentiments myself so I invested in a bunch of lawn fawn stamps and dies so I can start making some nice cards for my co-workers, friends and family.

I think the Chit Chat word balloons are going to be really versatile along with the hedgehogs as you don’t have to use the ‘sending hedgehugs’ sentiment. As well as that, I have been wanting the grass die cut for a while too so that when I am making scenery cards I can have some interesting grass fronds. I’m really excited to start making cards with these new supplies.

Birthday Card Making – Paper Smooches Nine Lives Cute Cat Stamp with Teresa Collins He Said/She Said Pattern Paper

simon-says-stamp-card-kit-march-2015-authentique-classic-beauty-card-stock

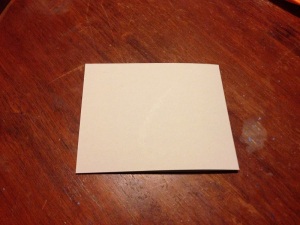
I started this card with a warm-toned beige cardstock from the Simon Says Stamp March 2015 Card Kit which I cut to size and then used the Martha Stewart Scoring Board to score a line in the middle and fold the cardstock in half to create my card base.teresa-collins-designs-he-said-she-said-orange-scrapbook-pattern-paper
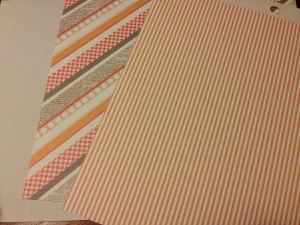
Next I chose the pattern papers I would use on the card. I wanted to do something different from the norm and I had a bit more time to waste on this card having the night off work and no one was at home, so I took my time with it and had a lot of fun.
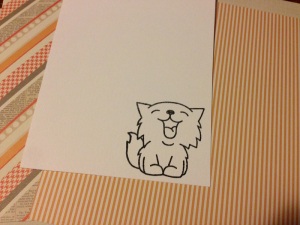
paper-smooches-nine-lives-cute-happy-smiling-anime-cat-craft-stampThe papers are from a Teresa Collins 6×6 paper pad called ‘He Said She Said’ and I chose two coordinating pattern papers with orange. I was making this card as a birthday present for a friend who happens to be red-headed and happens to also really like the colour orange, so I tried to make the card as ‘ginger’ as possible.
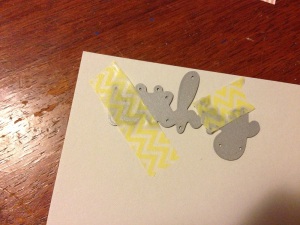
big-shot-die-cut-machine-yellow-washi-tape-adhesive-scrapbook-card-making-craftI wanted to try a few new things with this card and I hadn’t used the new die cuts I had purchased from Simon Says Stamp that I really wanted. I purchased the Simon Says Dies and Stamps From Me To You Set FMY175 Better Together a while ago as the set has many elements that I think are very versatile.
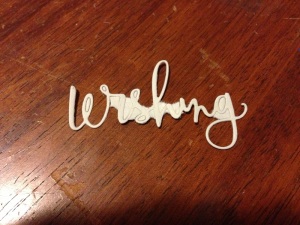
simon-says-stamp-wishing-sentiment-die-cut-big-shot-machineIf you like haul posts, you can check out the post I made for when I got Better Together Simon Says Stamp Die & Stamp set by clicking here. Unfortunately my Big Shot didn’t cut it out properly and I had already packed the Big Shot back away and didn’t want to get up again to run it back through…
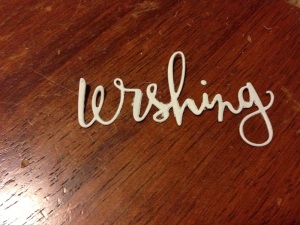
simon-says-stamp-wishing-sentiment-die-cut-big-shot-machine-scissors-touch-up

…So I decided to just try and fussy cut the rest out to touch it up a bit. I think it has a nice, ‘hand-made’ look to it. Haha!
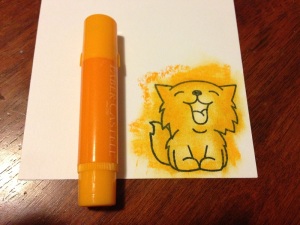
plain-cardstock-cute-cat-stamp-paper-smooches-faber-castell-gelatos-orange-card-idea

I have always loved this happy anime-style cat from the Paper Smooches Nine Lives stamp set. I stamped him out onto white card stock then I decided to colour him in using some orange Faber-Castell Gelatos.
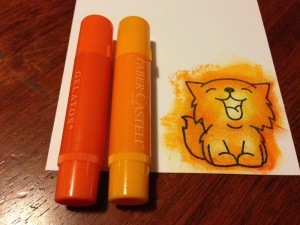
plain-cardstock-cute-cat-stamp-paper-smooches-faber-castell-gelatos-dark-orange-card-idea

I drew some gelatos around the edges in the lighter orange and rubbed it in using my finger and then added some value by repeating the process with the dark orange. I was really excited by how the cat was looking.
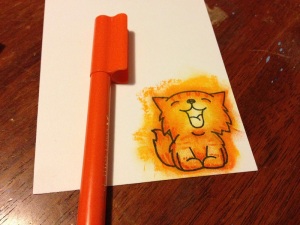
Plain-Cardstock-Cute-Cat-Stamp-Paper-Smooches-Faber-Castell-Connector-Pen-Dark-Orange-Card-Idea

Next I used a darker orange Faber Castell Connector-Pen to make some darker values and to give the ginger cat some little tiger stripes. So cute!
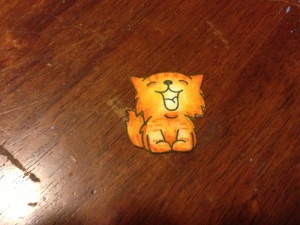
Plain-Cardstock-Cute-Cat-Stamp-Paper-Smooches-Faber-Castell-Connector-Pen-Dark-Orange-Card-Idea

After that I fussy cut him out and went around the edges using the Memento Tuxedo Black ink pen. I cut out a ribbon from some plain white cardstock and then coloured it using the same two Faber Castell Gelatos that I had used to colour in the cat.
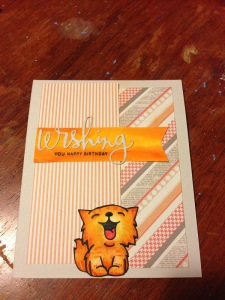
Simon-Says-Stamp-Wishing-Die-Cut-Happy-Birthday-Stamp-Set-Faber-Castell-Gelatos-Orange

I cut the pattern papers in two halves and aligned them on the card disjointed. I arranged the cat on the bottom to cover the bottom joint. I really liked this effect. I arranged the ‘wishing’ die cut on top of the ribbon and adhered it using a glue pen. Then I stamped ‘you happy birthday’ from the same stamp set underneath using Versafine black ink – it’s very crisp!
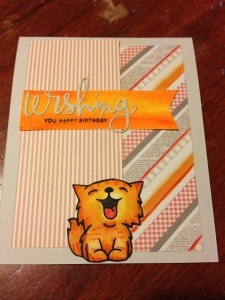
Simon-Says-Stamp-Wishing-Die-Cut-Happy-Birthday-Stamp-Set-Faber-Castell-Gelatos-Orange

Because the pattern paper was a little bit dull in comparison to the orange of the gelatos on the cat and the ribbon, I decided to rub some gelatos down the thicker stripes of the right-hand side pattern paper and added a scratched line in the dark orange of the Faber Castell Connector Pen. I think this really finished the card off nicely and brought everything together.

I really love how this card turned out and I can’t wait to try this gelatos colouring idea again in the future. I would also like to make more cards using the Simon Says Stamp Better Together set.